2K12 ‘Kub’ (SA-6) ‘Oktyabrskaya Revolutsya’


Background

 2K12 ‘Kub’ NATO codename ‘SA-6 Gainful’ was deployed by the USSR during the 1970s as a mobile, tactical surface to air missile (SAM) to protect ground forces from air attack.

It is designed to accompany tank formations and give them SAM coverage from medium to intermediate altitude.

This missile battery is complemented by the tracked SURN ‘Straight Flush’ radar vehicle , which is equipped with radar illuminator and optical sights, though various radar vehicles can accompany this launcher.

The chassis is based on the GM-578 chassis which is a by-product of the PT-76 design.

The missile propulsion is designed on a layout of rocket motor/ramjet configuration much like its predecessor, the 2K11 Krug (SA-4 Ganef).

Missile warhead option is of the fragmentation-high explosive type.

 The Kub saw action during the Middle Eastern regional conflicts like Yom Kippur War, 1982 Lebanon War, Gulf war and also the conflicts in the Balkans peninsula. This is the SAM that shot down Scott O’Grady’s (Basher 52) Viper over Bosnia in 1995.


The Kit

The box contained the following parts:

11 sprues containing the parts.

Vinyl hoses for the missile launcher.

A sheet of photo-etched parts for the engine grill and hooks are also included.

Tracks are to be built from individual links.

Decal options are for Soviet/Czech/Polish and GDR(East Germany) launcher vehicle.

The Build

This kit was built entirely OOB.

No modifications or added parts were used to enhance the kit.

The parts fitted well though some putty and sanding are needed in the missile warhead area as there is a gaping seam where the 2 surfaces mated.

I painted the kit with a paint scheme reminiscent of the Soviet Union’s ‘October Revolution’ Parades during the latter part of the Cold War.

The paint consists mostly of black green toned with some flat green and buff.

Dot-filter painting were also used to modulate the colors.

Some panel lines were highlighted with white stripes/lines typical of Soviet military vehicles with parade duties.

Raised areas where enhanced with dry-brushed Humbrol and Tamiya enamel paints.


Cheers!

Iking

Posted in Russian Tanks, Scale Models, Uncategorized | Tagged , | Leave a comment

T-62(model 1961) Reshetska armour, Afghanistan 1980s

BACKGROUND

The Soviet Union once amassed formations of large tank-rich army ready to roll across the Fulda Gap in Central Europe.

They are a machine forged through war and ready to strike against the United States and NATO should a shooting war occur.

Fortunately, no shooting happened on both sides of the Gap.

It happened somewhere else, in the place where empires and great powers once battled.

It happened in Afghanistan.


The Soviet Union sent troops to Afghanistan in 1979 to help the Marxist Afghan government quell a Muslim rebellion in the country.

Though initially, the Soviet military functioned as ‘advisors’ much like the US advisors were doing in Vietnam during the early phase of the conflict. It is only during 1979 invasion that the Soviet military got embroiled directly in fighting the mujahideen.

After the 1979 invasion, the Soviet Union have sent great quantities of tanks, helicopters, military aircraft and personnel to bolster the Afghan military in combating the mujahideen or Islamic ‘Holy Warriors’.


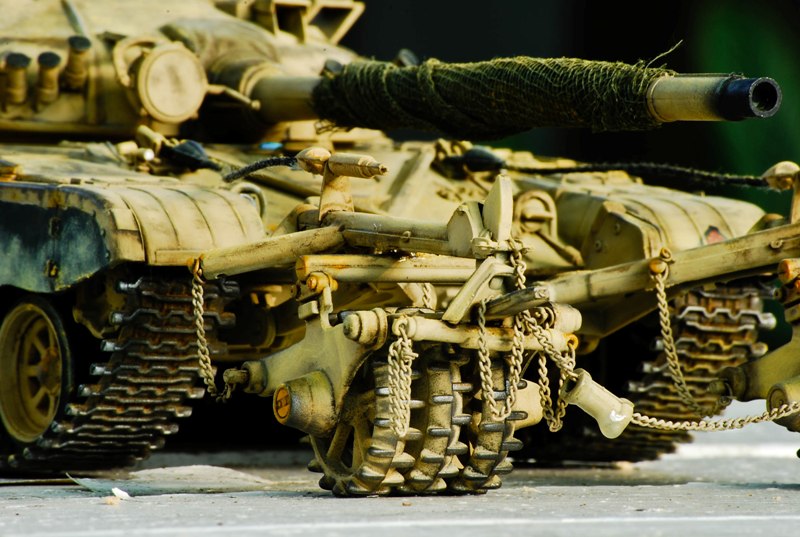
One tank got my attention, the T-62.

The T-62 is a successor to the famous and widely exported T-55.

It is an upgrade of the T-55 design employing almost the same basic layout.

Some of the notable differences are the lengthened hull; re-shaped and up-gunned turret housing a 115mm smoothbore ‘Molot’ gun; different gap and set of road wheels; and the bore evacuator which is placed midway between the mantlet and the muzzle.


The T-62 initially served with the Soviet Army in early 1960s onwards.

They were offered for export afterwards to Warsaw Pact satellite states and to the Soviet client states.

The main export customers are the Arab countries like Egypt, Syria and Iraq which in turn used it on the Mid-Eastern regional conflicts.


The T-62 served the Soviet Army in Afghanistan because the Soviet Army found out that the T-72’s suspension is susceptible to breakdown once it rolled in the rocky Afghan terrain.

And so the T-62 became their tank of choice.


THE KIT

The kit is mostly flash-free and I’ve noticed almost no sinkhole nor visible ejector pin marks.

The kit is the closest kit to an actual T-62 (taking off from the available Tamiya T-62 kit).

17 styrene sprues are contained in the box together with 1 plate for some photo etched (PE) parts.

Tracks are the individual links and it depicts the early style tracks preceding the T-72-style tracks that were used on later T-62 models.

The rubber wheels are molded separately from the road wheels making it easy for the modeler to paint and perform customizations

Braided copper wire is also included for the tow cables.

What’s fascinating is that, Trumpeter managed to squeeze in an aluminum barrel which really improves the kit, although a plastic one is still optional.

The kit’s overall details are crisp and sharp.

Trumpeter offers 2 variants of this tank; the 1962 and the 1972 model.


THE BUILD

Parts have a perfect fit though some minimal filling is required on the mating areas of the rear upper and lower hull around the fuel drum area.

The individual track links fitter perfectly and can be shaped easily once ready for fitting.

The turret catches and fits the turret ring perfectly and scot-free.


Though, I have made some modifications on the kit.

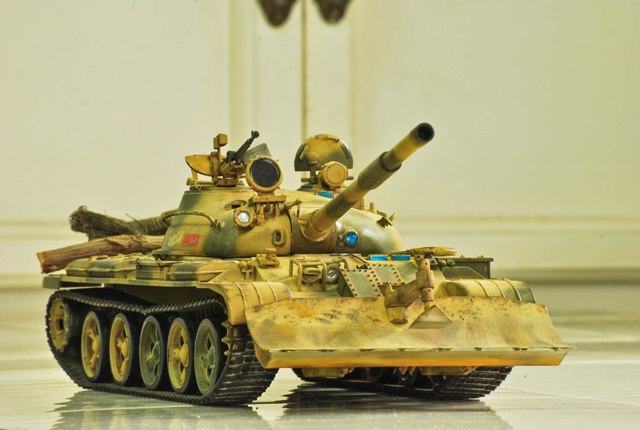
First is, I’ve scratch built the ‘Reshetska’ armor based from sheet PLA.

Reshetska armor is the precursor of the modern screen armor that is being used widely today.

These were used by the Soviets to prematurely detonate RPG and shaped rounds much like the US forces are using it today in Iraq and Afghanistan.

This was done via a careful slicing of sheet styrene. The sheets’ gauges that were used is around .40mm.

To position them, I used modeling clay as a jig to secure the main frame where I will mount the shutters individually.

They were then mounted on the tank hull and turret using CA glue.

 The un-ditching beam secure belts were also scratch built from sheet styrene.

I have also modified the hatch details. They were improved based on scratched items like periscopes, lead wire, sheet styrene and putty.


THE PAINTING

The kit was painted with Tamiya acrylics and enamels then weathered with oil paints, pigments and Tamiya Weathering Master Sets.

The tank’s base coat is a mixture of Tamiya Olive Green, Flat Green and Flat White.

They were over-sprayed then with the same mixture but with a copious amount of Flat White and Flat Yellow.

The Flat Yellow is the one that gives the leafy/lime green tint on the Russian Green.

After the basic pre-shading was done, it’s time for modulation.

The tank’s color was modulated through the use of pinwash/color modulation/oil dot filtering technique.

PInwashes were used to emphasize the shadows of the recesses, crevices, bolts, weld joints and give total shadow on the tank.

Right after the pinwash were sealed with a flat coat, dot filtering was done using a variety of oil colors like White, Green, Ochre and Umber.

A final misting of lighter base coat was sprayed to modulate the pinwash and oil dot filtering that were previously done.


Additional weathering was done using an assortment of pigments.

The pigments that were used are Vallejo and MIG Productions pigments.

The pigments were fixed and set via an isopropyl alcohol.

I also tried to apply scratches/dry-brushes using brush strokes applied randomly.

The paint for the scratches is just the base paint mixed with more amount of white just to highlight the scratches and ‘fresh’ paint as it happens on household steel gates.

I did some sponge technique which I read from Miguel Jimenez’s blog to simulate wear on the flat areas like turret roofing and engine deck.

This was done by wetting a sponge with your desired paint then applying it sparingly on the areas you that you want to weather.

It’s more like dry-brushing but instead of brush you will use a sponge.

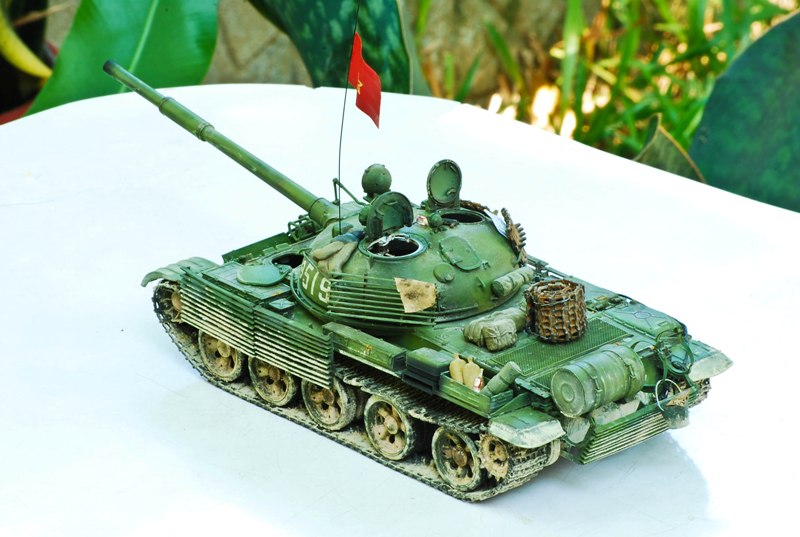
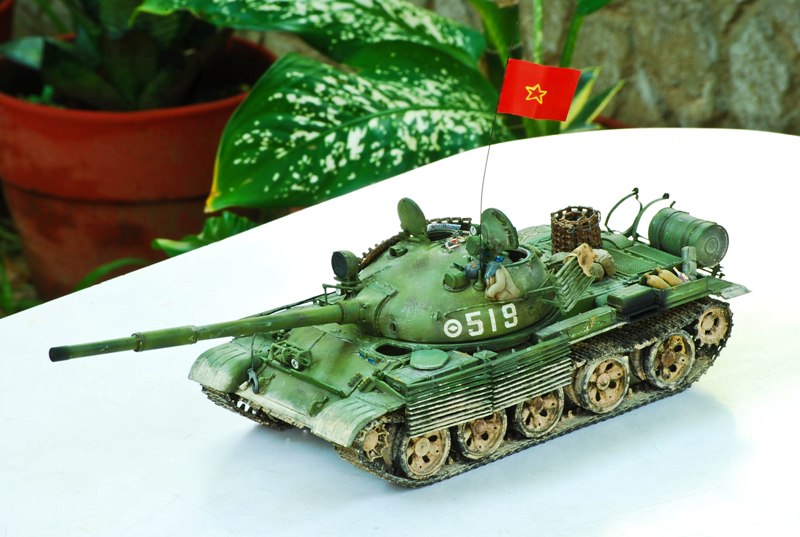
I added a flag which is the ‘unofficial’ ensign of the Soviet Ground Forces from the Red Army days to present.

The flag is made from coupon bond painted with enamels.

The dirty rags hanging from the turret cage and bucket are made from paper towels.


I added my impressions of mini Stolichnaya vodka bottles to accompany the Red Army on the lonely hills of Afghanistan.


Finally it is done.

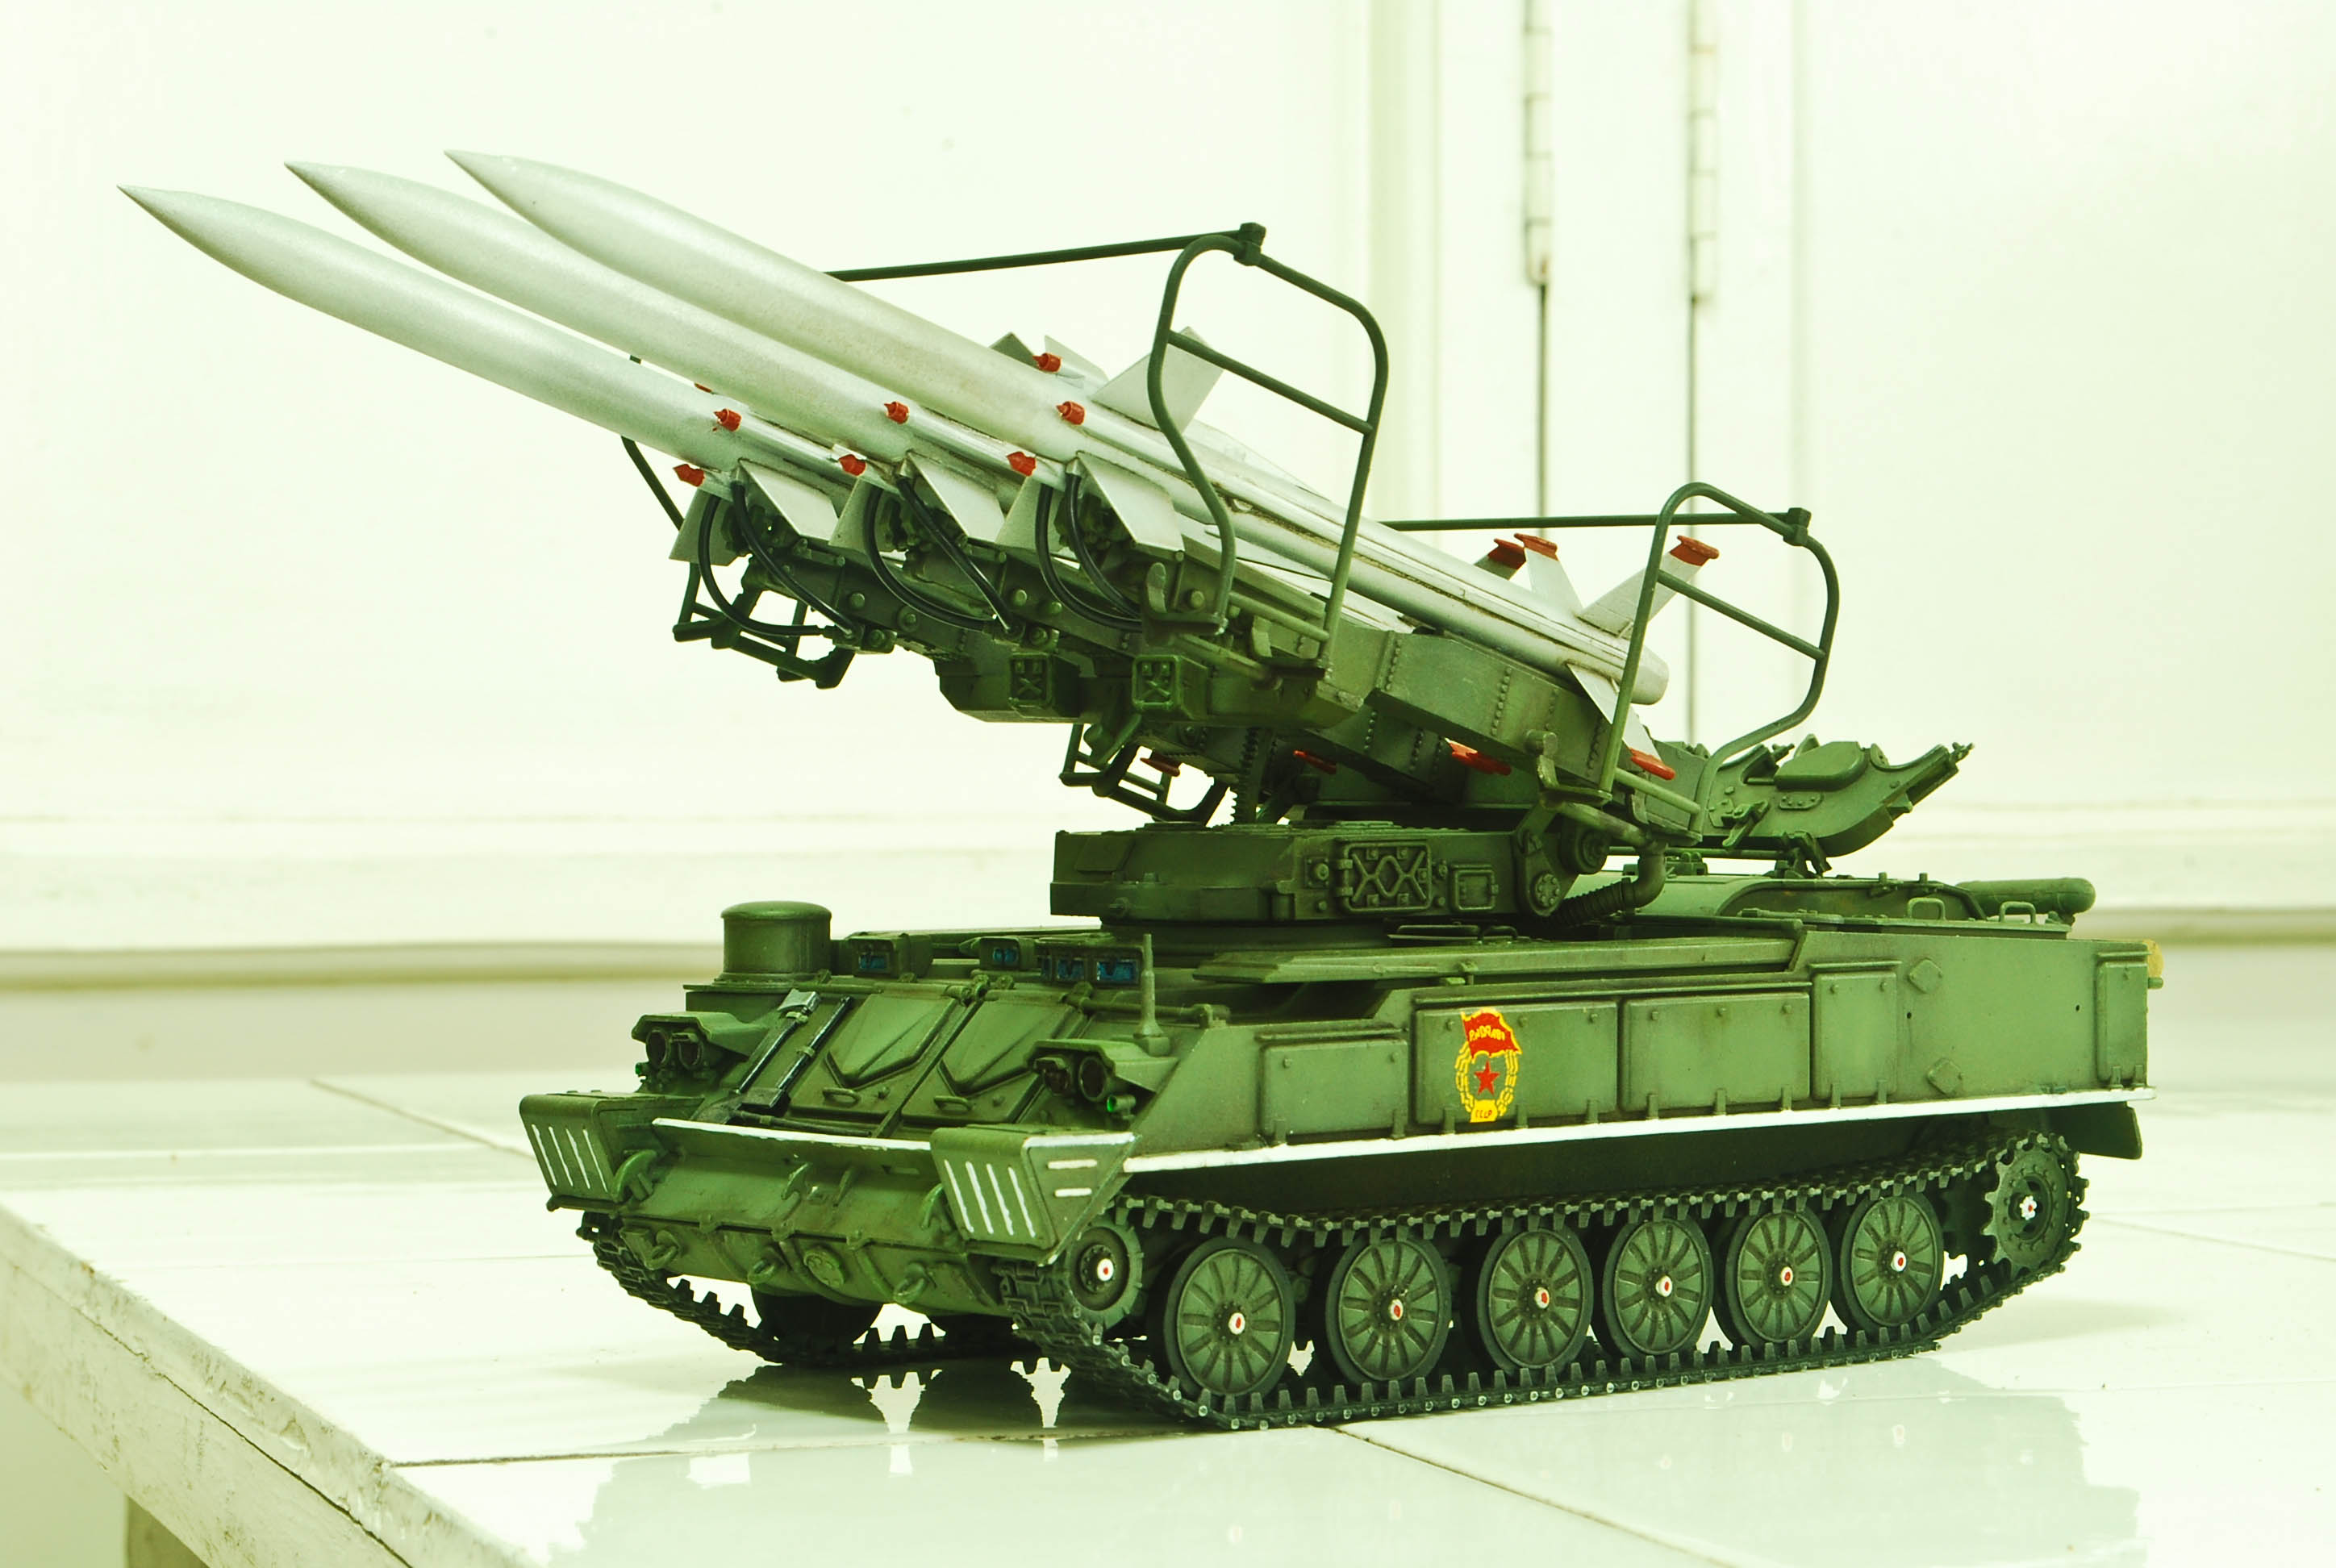
The T-62 model 1962 with the tactical markings of the ‘Berlin’ Tank Regiment, 5th Guards Motor Rifle Division, Afghanistan 1980s is now ready to roll in the Afghan countryside.


 It took me around 2 months and a half to complete this kit but nevertheless, it was an enjoying and exciting build entry for the IPMS-BA group build ‘Afghan War’.


Many thanks to the guys in IPMS-Philippines for teaching the how-tos re: color mods. 😀

Cheers!

Iking

Posted in Russian Tanks, Scale Models | Tagged | Leave a comment

Tamiya 1/35 Iraqi T-62 with BTU-155 dozer blade

Last Christmas of 2010, I received a present which is a Trumpeter T-62 mod. 1962 kit.
I kept looking at it but I was not assembling it yet since I was saving it for a groupbuild on my local modelling club.
I was amazed on how the Trumpeter folks squeezed details and corrected the flaws of the only T-62 kit that I have known, the Tamiya T-62 model.

I then decided to experiment.


I took one of my old Tamiya T-62 kit and modified it.
Based on the Trumpeter turret, I tried to rectify the Tamiya turret by applying an epoxy A/B putty blob in the turret’s front undercut.
After it has dried, I sanded it to make it look more hemispherical.

Next is, I tried to replace the kit’s turret stanchion with an improvised one.
The stanchion that came with the kit was already brittle and some of it are broken already.
I replaced it using a skinned paper clip. I took off the vinyl coating of the clip then molded it to shape.
The clip is pliable, though you may need a long nose to shape it well.
The small cleats on the back of the turret were made from chicken wire, bended and shaped to size.
Fuel lines were also improvised using, again chicken wire and masking tape. This was patterned after the Migs aftermarket T-55/62 fuel line details.
The turret’s commander hatch was also enhanced.
I have added additional hatch details (i.e. periscopes, latches, handles) based on net photos and those from Armorama.

As this is an engineering vehicle, the BTU-155 dozer blade came from the Trumpeter Finnish T-55 kit.
No modifications were done on the BTU-155 dozer blade.

For the painiting, I repainted my model with Tamiya acrylics.
I did not remove the previous paint job but just sprayed a new coating.
I used a mixture of 1:3 ratio of Tamiya acrylics Flat White and Dark Yellow for the sand color.
For the green, I used Tamiya Olive Green, toned with Buff.
Tamiya Basic Spraywork was used to paint the tank’s camouflage scheme freehand.
Basic pinwash was done using a variety of oilpaint, enamel paint and lighter fluid solution.
Weathering and soot was done using crushed pastel chalks brushed on the tank surfaces and tracks.
Additional weathering applied is from the Tamiya Weathering Master Set.
The paint chipped-effect was done using toothpicks and fine brushes.
This was done by making a small, fine dots of the base color mixed with white.
After it has tried, a mixture of Tamiya enamel red brown/german grey was painted over them, with just a minimal exposure of the previous fine dots that you have made to give out an impression of chipping similar to whats happening on your residential steel gates.
Scratches (via dry brushing) were also done using the paint mixture above.
These were done on those areas exposed to crew traffic like walkways, edges and hinges.

The decals came from the assortment in my spares.
I used the ‘Iraqi’ decals that came from a Dragon Models Shilka Kit since I plan to depict an Iraqi tank on this one.
Some of the decals went to gazillion bits when immersed in water.
I guess, stored decals won’t last that long.

The stowages came from medical gauze which was sprayed green and is used to create the camouflage netting.
A spare, real, tree branch was also used as the tank’s unditching beam.

The sole figure is a Tamiya T-62 tank crew.
I rectified it with a gas mask made from epoxy clay and vinyl tube.
This was inspired by the crew of David’s (SMT-1975) 1/35 KDKhR-1N Dal in Armorama.

Now, Im not so sure about the accuracy of the kit but I do hope you enjoy the model 🙂

Cheers!

Iking

Posted in Russian Tanks, Scale Models | Tagged , , | Leave a comment

Minihobby 1/35 T-72G with mine plow.

This is a cheap minihobby kit that I’ve built OOB.

I bought this kit many many years ago but I just manage to assemble it around 2 years ago.
The kit is very basic, a rough copy of the Tamiya T-72M1 kit.
The kit is copied down to the point wherein the trademark Tamiya cartoon-ed crewman on its instruction sheet is also on this kit’s instruction kit.
Flashes are quite many and some alignment needs to be done on the roadwheels.
Despite of these shortcomings, I still had fun in building this kit.
I painted it with acrylics using a mixture of Tamiya Buff and Flat White.
The rubber skirts are painted using Tamiya Flat Black.
The painting then was very basic,straightforward pre to pinwash then post-shade routine.

Lately, I weathered it with oils, pastels and Tamiya Weathering Master Set.
I also spiced it up with accessories which are assorted stuff sourced from my other kits’ spares.
The Iraqi RG logo was handpainted, pardon the imperfect shape.
The antenna is made from a guitar string cut to length and painted with Tamiya Flat Black Enamel.

I then weathered it with oils, pastels and Tamiya weathering master set.
Accessories are assorted stuff sourced from different kits.
The Iraqi RG logo was handpainted, pardon the imperfect shape.
The antenna is made from a guitar string cut to length and painted with Tamiya Flat Black Enamel.

Now the mine roller is the question.
This is a KMT-series mine roller that came with the kit.
Based on my research and opinions from my colleagues, there were no pictures of Iraqi tanks sporting the mine roller.
All that I saw were Iraqi T-72 tanks sporting the KMT-series mine plow, but not the roller.
To further add up to the confusion, the kit’s box art features a soviet green T-72 sporting a mine roller BUT the tank has a Dazzler system installed on its turret.

Given these observations, this build is probably a what-if tank for the Iraqi Republican Guard division.

Hope you enjoy the build!

Feel free to share your comments. 🙂

Cheers!

Iking

Posted in Russian Tanks, Scale Models | Tagged , | Leave a comment

DML 1:35 T-72 (revived)

We all have our modelling woes. There were some of us who’ve built a kit but somehow got disappointed in the end result because of misaligned parts, bad paint job, marred plastic due to solvents and a whole lot other reasons. I too have my share and some of those models that were built which are way below my personal expectation and satisfaction. Most of those kits were resigned to their fate…on my personal bone yard.

However, on the latter part of 2010, I logged on to my forum account in IPMS-Bert Anido and read some of the updates. This is the only time that I logged into the forum after my modelling hiatus from early 2009.

I got kickstarted to pickup my kits and build them after I read my fellow modellers updates.

So it began.

I picked up one of my ‘retired’ DML T-72 kit that is already residing in my  boneyard. It was painted in multiple coats of Tamiya spray lacquer Light Sand then sprayed with Tamiya Buff. The Tucha smoke mortars weren’t properly aligned. The fuel drums on the back are incomplete (1 is detached), the tracks offshoots the road wheels, the NSVT MG is also partly destroyed and a lot of small details are also missing. If I may recall this was built way back in late 90s.

I got this old, badly mauled kit again and started to tinker my way in rebuilding it. I tried to research through the net and in the IPMS-BA forum for references about the T-72 tank.

What I did are the following:

I first sawed-off the rubber skirts of the tank. I want to depict a skirtless T-72 tank since I rarely see a scale model of this kit which has an absent rubber skirt.

I then disassembled a part of the tank tracks to realign them correctly against the road wheels.

In the turret section, I tried to improve the mini-stanchions which are made from chicken wire, just reshaped estimated to the size of the stanchions in real-steel photos. The NSVT was re-attached and its box structure (I suppose it contains sighting system) was improvised from spare parts in my stash. I also completely removed the Tucha smoke mortars since some of it were missing and I also found pics of T-72 without the mortars.

 In the rear hull, I tried to add detail to the reattached fuel drums by adding their hose and plumbing. I notice that I forgot to research about the fuel plumbing that is crawling across the rear, top hull in the back of the turret; the plumbing that crawls in the ‘trench’ between the engine compartment roofing and the fuel cells in the fender.

 After the rectifications were done, I applied a pre-shading of Tamiya Flat Black on the kit. Special emphasis were made on corners, edges and unexposed area so it will kinda give off a shadow once the post-shading is done. The post shading were done using a mixture of Tamiya Dark Yellow and Tamiya Flat White to create a desert shade similar to an Iraqi tank.

Weathering was then applied using a mixture of oil paint, and enamel wash to accentuate the panel lines and details. Another weathering that was used here is chipping. The chipping was shared to me by a colleague from the IPMS-BA . This is just the first time that Ill be using the chipping technique. The chipping were done by the use of Tamiya enamels namely: German Grey-Red Brown mixture for oxidized steel and Dark Yellow mixed with more Flat White for those chipped areas with visible ‘raw’ paint. Powdered pastel chalk were also used as a substitute for pigments to create a filter effect to make the tank look natural.

 The stowage are items scrounged from my spares box. Straps were made from strips of masking tape.

Cheers! 🙂 

Iking

Posted in Russian Tanks, Scale Models | Tagged , , | Leave a comment